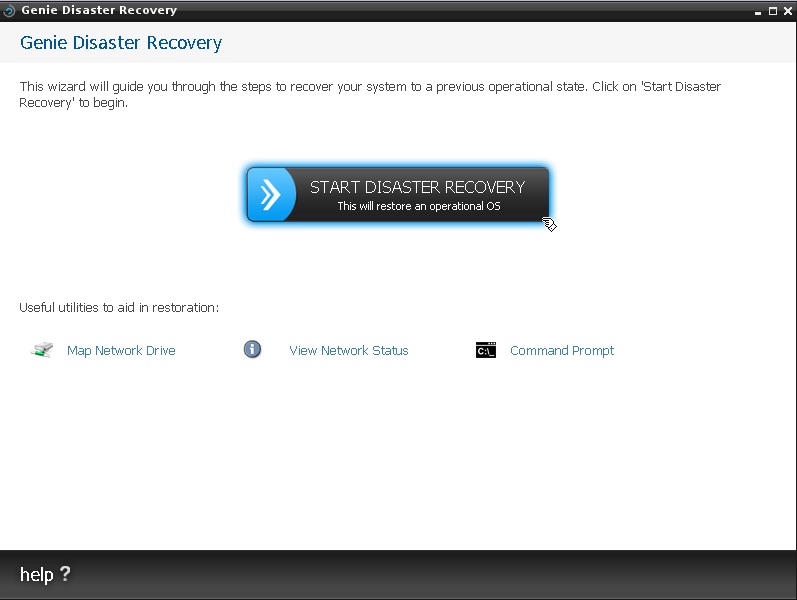
- This is the first screen of the Disaster Recovery wizard of Genie Timeline (GTL). Press the Start Disaster Recovery button to begin with the restore.
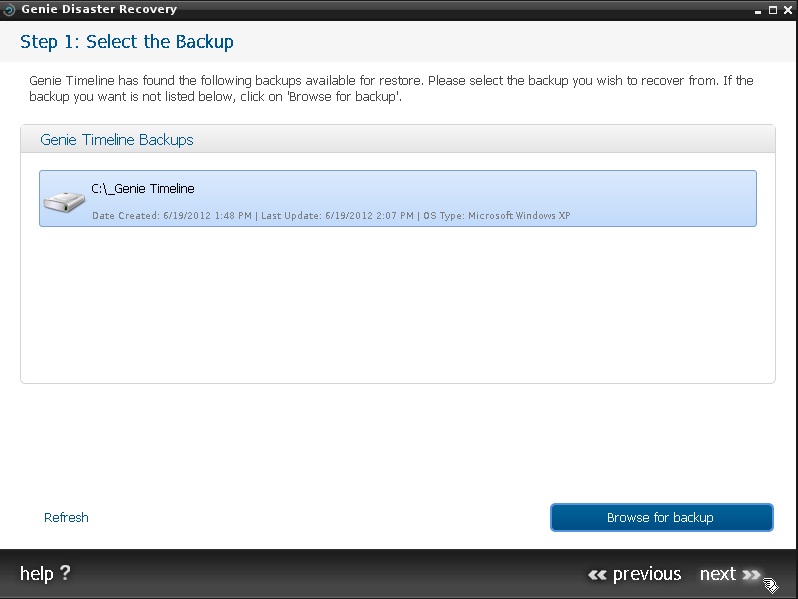
- If your backup is stored on the root folder of the drive, then Genie Timeline will be able to detect it. If not, please use the Browse for backup button → Navigate to your backup drive → Select the _Genie Timeline folder → Click Next.
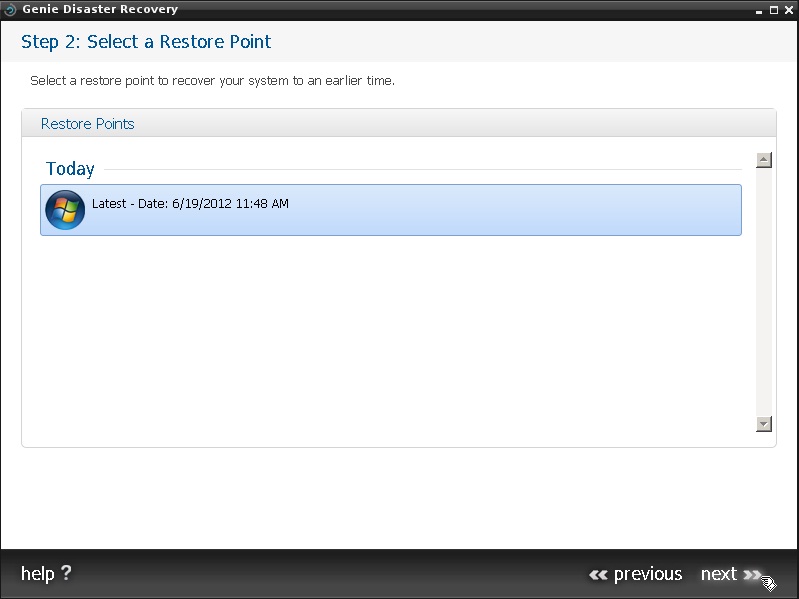
- Afterward, choose your restore date; please note that Timeline creates one restore point each week.
- In this step, you can choose your restore options. It is recommended to keep the default settings.
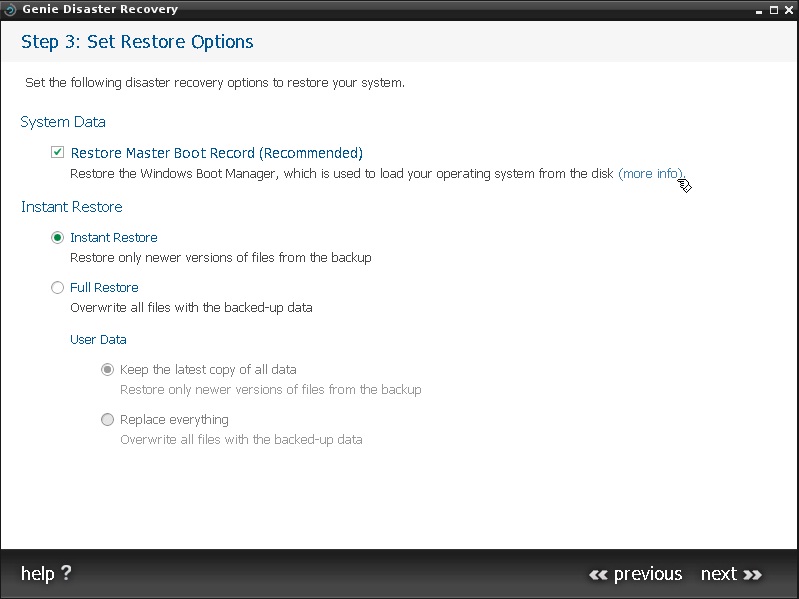
- This is an explanation of Master Boot Record seen in the previous screenshot. Please note that by pressing Next on this step, the recovery process will start. So if you are just testing the Disaster Recovery procedure, please press the X icon to close the What is the Master Boot Record? screen and close the Disaster Recovery window to reboot the system without making any changes.

APPLIES TO: All Genie Timeline versions.

